Heirloom Soap Works and The Soap Bar. We are having a give away. Three Heirloom Soapworks soaps and only one winner. If you want to participate, please leave a comment about why you love handmade soap,. On November 1st, I will choose the winner randomly.
This random "out of the hat" give away game is open to everyone. Young, old, national, international... just leave a way for me to get in touch with you in your comment. :) The only requirement, I suppose is that you have an email address so I can get in touch with you.
Good Luck!
Tuesday, October 26, 2010
Friday, October 22, 2010
OK Go
I love this video! It looks like this was done in one video take. In fact, they swear it was done in one fluid take (take 74)* These guys are funny. I saw another one of their videos a couple of years ago with them on treadmills.
Watch the whole thing if you have time and if you like dogs. Sorry the video is a little bigger than the width of my space. I couldn't figure out how to edit it.
You are probably better off watching it on YouTube:
http://www.youtube.com/watch?v=nHlJODYBLKs
:)
Official music video for OK Go's 'White Knuckles'.
Directed by Trish Sie and OK Go. Produced by Shirley Moyers.
Special thanks to: Lauren Henry and Roland Sonnenburg and their team of trainers from Talented Animals, the town of Corvallis OR for being so welcoming to us, NYPro for donating the space.
Monday, October 18, 2010
Saving A Seize: A Tutorial by Anne-Marie
I'd like to thank Anne-Marie Faiola, of Brambleberry, for taking time out of her busy schedule to create this tutorial to share with all of us. And check out those awesome snazzy goggles?? Think I may have to get a pair of those next time I place an order. :)
* * * * *
 Anne-Marie's re-batched soap
Wearing all of your safety equipment, pour your entire batch into a stainless steel pot. The lye in your soap is still present because saponification didn’t quite work out the way we had planned on. Your pot must be 3X larger than the batch size. You need a lot of head space for this process.


Put the pot onto the stove. Turn the stove onto medium.
With your goggles on, start to stir your gloppy, blobby mess. It’s okay if it’s still in chunks. It will start to liquefy shortly. Keep stirring.

If your soap starts to pop oil up at you, turn down the heat until the oil is no longer spitting at you from the pot. You want to stay as close to medium as possible.

Keep stirring. The soap should start to fully liquefy and become an oatmeal like consistency, easily stirrable.

When the entire batch is fully consistent in texture and color (no oil leaking, no strange looking globby spots) and the batch is sticking together in the pot in a smooth and homogeneous manner, you are ready to glop.

This soap is hot, hot, hot. Make sure that the mold you are pouring the soap into can withstand the heat. This plastic mold started to bow on me soon after I put the hot soap into the mold.

Let the soap cool for 24 hours and harden up. The soap is ready to use right away. You have literally cooked the pH down to a soap-level (around 9). If you let the soap sit for 4 to 6 weeks, it will become harder as it evaporates out its water.

Great save. Great tutorial. Thanks, again Anne-Marie!!
Sunday, October 17, 2010
Lazy Sunday Kittehs
My kitties

The Boss, Sippowitz (but we call him Kitty) at 16 yrs old. He was there when I was single, then through my wedding, when I had my dog, the coming of both babies, several moves from apartment to house to house to house and two states and here he lies. Alive and still sweet. Oh he looks old, but he keeps ticking. That nasty wet food is what gets him up every day ;) Gosh, he's older than my 13 year old daughter who stands at my height, knows more math than I remember and is beyond her years.

Motor, our fraidy cat man. Feisty, smart and most lovingly annoying at 6 yrs old. His stomach hangs so when he runs, his tummy swings from side to side and throws him off balance, his meow sounds more like a mowe and he won't stop moweing until he gets in or out of where he is. If he wants to get outside and we are watching tv, he'll hop up on the short bookcase right at the door, look at us and then find something on the bookcase to push off with his paw. He will look at us while he slowly pushes the object off. If you have seen Frisky Dingo, it is Killface's son, Simon, when he pushes his bowl of Capn' Scrump off the counter while his father is saying, "no Simon, stop that Simon!", while Simon is staring at him while continuing to slide the bowl right off the counter until the bowl falls and smashes to bits. Exactly.
Also he has the need to sleep directly on top of me when I lie on my side. He needs to teeter.

Our Youngest, Dot (4 years), is the most patient with any child and will never bite or scratch anyone but will always have a daily cat fight with that one neighbor cat next door. That is her only fault. Also, the top of her head smells like the faintest smelling perfume or baked goods depending on the day. Every day she smells amazing. She is dreamy.
My daughter took all of these pictures. Just giving the credit where credit deserves.
Sunday, October 10, 2010
Come On Over For Tea & Cookies
I am telling you that it's getting crazy over here with the scent inations I have been whipping up. As you may know I recently made Poison Apple soap which was my new, fast favorite which beat all the rest, but now two more just pulled up right next to Poison Apple at the starting line with their big hats on. Mmm.


These two fragrances, if the fragrances stick and I believe they will, will become part of our permanent catalog. :O)
Cure date: Halloween!
Vanilla Chai Cream, made with olive oil, coconut oil, palm oil, coconut milk, shea butter and castor oil. First time I made a coconut milk soap although, I have always wanted to since coconut is my favorite scent, drink, taste everything, doesn't it make total sense for me to use it in everything?!?


My favorite tea is Chai. Actually, I stopped drinking other kinds of tea about 3 months ago because I find them boring now. My friend, Cocobong sent me a lovely Chai tea from Germany and yesterday I bought coconut chai tea online which I can not even tell you how excited I am about THAT! (excited.)
On to the cookies!
I made a soap that smells exactly like these:
 No kidding - for real. I'm not saying my fragrance is supposed to smell like this. I am saying IT DOES LIKE THESE COOKIES! This is the first rendition of it. The look will change a bit. But here is the 1st batch:
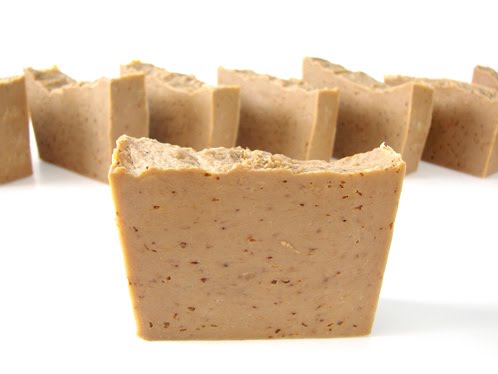
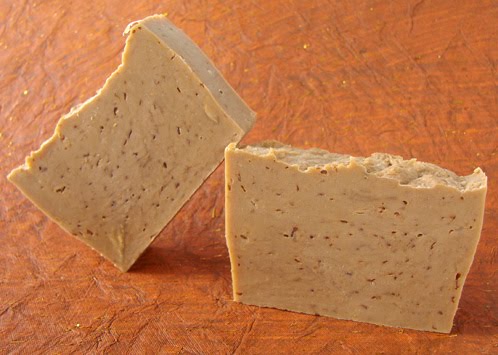
 shea butter soap
On to the cookies!
I made a soap that smells exactly like these:
 No kidding - for real. I'm not saying my fragrance is supposed to smell like this. I am saying IT DOES LIKE THESE COOKIES! This is the first rendition of it. The look will change a bit. But here is the 1st batch:
 shea butter soap
These two fragrances, if the fragrances stick and I believe they will, will become part of our permanent catalog. :O)
Cure date: Halloween!
All of the soap photos in this post were taken by my daughter, Nina Schmidt.

*

*
Friday, October 8, 2010
Holiday Crunch Time For Soaping! Rescue CP/OP Tutorial By Dreaming Tree
Some of you are busy with life or other work and the holidays are creeping up on you. Cold process soap making takes 4-6 weeks to cure. It's panic time! Jennifer and Meghan of Dreaming Tree Soapworks offered to create a tutorial for the soaping panic monkeys out there who need to save a little time and stress in their lives. This is their wonderful tutorial. Thank you Jen and Meghan for your generosity of your time and wealth of knowledge!
xo Joanna
CP/OP is the common soaper abbreviation for Cold Process/then Oven Processing the batch. It's actually a very simple procedure, but whats more important is understanding the Pros, Con's, and precautions of this method. How CP/OP works is that unlike regular Cold Processing where the soap is left to fully saponify over a long period of time, putting it in the oven with a low heat applied with the extra insulation of the oven itself, speeds the saponification process a long, rendering the lye null much faster.


Once you've reached this point, you are ready to pour your soap into the mold! (Remember to line your molds! Freezer paper works wonders)


xo Joanna
-----------------------
CP/OP is the common soaper abbreviation for Cold Process/then Oven Processing the batch. It's actually a very simple procedure, but whats more important is understanding the Pros, Con's, and precautions of this method. How CP/OP works is that unlike regular Cold Processing where the soap is left to fully saponify over a long period of time, putting it in the oven with a low heat applied with the extra insulation of the oven itself, speeds the saponification process a long, rendering the lye null much faster.
The obvious and main pro is that unlike traditional cold process soap, it does not require a 6 week cure time. The soap is technically safe to use once it has completed it's full time in the oven, we still recommend at least a two week cure time to ensure harder, longer lasting bars, and to always PH/zap test before distributing! This makes CP/OP soap particularly appealing if you are on a deadline, running out of stock faster than you anticipated, or do a lot of craft shows and like to manufacture fresh to order.
There are however a few considerations. First, I don't recommend this process for new recipes, new fragrance oils, new essential oils, essentially anything you haven't worked with before. It's important to know how the particular recipe/blends behave; as some ingredients tend to super heat, such as honey, spice based fragrance oils or essential oils, white florals, and several others. It could result in a soap volcano going off in your oven, or worse (we know from experience, trust me).
Another consideration important to the success of the CP/OP batch is the flash point of your fragrance oil/essential oils. Since the soap will be exposed to high temperature longer (between 175-200 degrees for several hours) fragrance and essential oils with flash points lower than this tend to "burn off" resulting in soap that either doesn't smell at all or is very faint, or morphs into something unpleasant (burnt tire anyone?).
Lastly, consider your color scheme, if you use a bunch of lab colors, and even some oxides, with a complex design that is your signature or you're married to; this process may not be for that soap. The extended exposure to heat can cause colors to morph (we've had a few blues go florescent pink), fade, or bleed, and anything with vanilla, amber, or certain other resins will go dark, dark brown and bleed into everything else. Don't get too discouraged, if there is one thing I've learned in my eleven years of soaping is there are always exceptions and happy accidents!
Example of appearance of CP soap vs CP/OP : Renaissance (the lighter colored soap is regular cp the dark one is cp/op)


A few more things to go over before hopping to it:
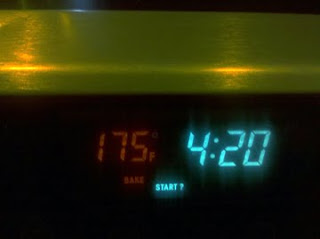
1. If you have an older oven make sure you get an auxiliary oven thermometer so you have an accurate oven temperature, for this process you want to make sure it's between 175 and 200 degrees, lower the process won't complete, higher you'll either have a soap explosion or soap puffs.
2. You want to make sure your mold is heat safe for these temperatures. If you are using a wooden mold you want to be sure it's made with untreated lumber.
3. Always remember to wear safety gear when handling lye! No, we're not showing you a picture of our mad scientist goggles & apron! Ha!
On to soaping!
Measure out your oils & butters and set them aside in a pot; ready to be turned on later; midway through the lye & water mixture's cooling process (we're a little kooky, we've got it down to a timed science)
After you measure your water content & lye - slowly pour the lye into the water - never pour liquids into the lye, as this could cause an explosive reaction, which is clearly unsafe. Remember, always add lye TO the liquid!


Stir the lye/water mixture until you notice the color becomes clear.


At this point it's a good idea to set a timer to remind you to turn on the heat for your oils & butters.


Once the lye & water mixture has cooled off between 100 and 120 degrees, depending on your fragrance(s), and your oil & butter mixture has completely melted and cooled to approximately the same temperature, you're ready to start mixing your soap!
* Note - an important tip to keep in mind, the higher the flash point of your fragrance(s), the less likely they are to "lose the scent" during & after the curing process.

After the pot is set into the sink, we pour the lye & water mixture into the pot, slowly hand-stirring with our mixer. We then use the hand-held mixer to get the mixture to a light trace, almost like a very soupy pudding.
Next, we add our fragrance, hand-stirring as it is poured into the pot, to help avoid fussy behavior, then use the mixer to thicken the mixture to a thick pudding consistency.


Once you've reached this point, you are ready to pour your soap into the mold! (Remember to line your molds! Freezer paper works wonders)

If you choose, you can create "fluffy top" effects, whether it is swirls, lattice style, or any other design you can think of (we have no method for this, we just play with it until we yell at each other to leave it alone).

Now it's time to set the temperature & timer on the oven! You'll want to set the temperature between 175 and 200 degrees (which ever is the lowest your oven can handle), and let it 'cook' for 2 hours. After the 2 hour mark, turn off the oven, and let your soap stay inside for another 12 hours.


After all is said & done, carefully remove your soap from the oven; then remove it from your mold & it's ready to be cut into bars of soapy awesomeness! Once again, we recommend giving the bars a two week cure, and a Ph/zap test before distributing.
There you have it! Dreaming Tree's CPOP Tutorial!
Thank you, Jennifer Denault and Meghan Runyon
of Dreaming Tree Soapworks!
Go visit their shop here :)
xoxo
of Dreaming Tree Soapworks!
Go visit their shop here :)
xoxo
Friday, October 1, 2010
That Is Soap?

This knocked me over this morning when I went to Inner Earth Soap's blog. At first I thought Erin was sharing a close up shot of a scarf she was knitting. Then I read that this is her Candy Cane soap. Wowowow. That detail is phenomenal. ... and I love that the main part is all glittery.
It's well worth the trip.
*
Subscribe to:
Posts (Atom)